Table of Contents
- Wondering how to rewire a house? Keep on reading...
- The design process🎨
- Cable routing
- Materials selection💡
- Tools required
- Installation locations🛁
- Consumer unit requirements
- First Fixing & Construction Phase🧑🔧
- Second Fixing
- Testing and Inspection process⚡
- Typical obstacles and issues that arise
- Documentation required📋
- Handover to client
1) Wondering how to rewire a house? Keep on reading...
If you are looking for HOW TO REWIRE A HOUSE then we take you through the step-by-step process used by electricians when they are rewiring houses.
Back to top2) The design process🎨
When considering a rewire of an electrical installation there are a number of variables to consider at the design stage of the process. Both the Building Regulations and BS7671 should be consulted at this stage to ensure that proposed circuit designs will fulfil the requirements of the demands in the electrical installation. If there are to be high powered appliances such as an electric cooker, an electric shower, an immersion tank, electric boiler, or car charger to name a few, then the design currents of these should be calculated. Care should be taken to ensure that the maximum demand of the electrical installation does not exceed the supply capability of the incoming mains supply.
Should the design require more capacity than is available then the Distribution Network Operator should be consulted with a view to increasing the supply potential in order to adequately supply the new installation.
The division of the installation should comply with the requirements of regulation 314 and thought should be given to the inconvenience to the users of the electrical installation in the event of an electrical fault.
Any possible future demands on the installation should be considered and the capability of the circuit to cope with those demands.
3) Cable routing
As many electricians will know, the routing of cables can prove to be a headache. Not only should the wiring zones be adhered to in accordance with the building regulations but care should be taken to ensure that cable derating factors are avoided where possible. Complications such as cable grouping, thermal insulation and varying ambient temperatures can affect the ability of the electrical cables ability to adequately displace its heat during normal operation. The inability to rid itself of the heat generated through use can mean that the cable overheats and becomes a danger to the electrical installation unless adequately protected at the consumer unit. Cable routes should generally avoid thermal insulation such as loft insulation or wall insulation as this will seriously affect the cables’ ability to handle the require electrical current for the circuit. Where derating factors cannot be avoided, the design stage may need to be reconsidered to ensure that cables of adequate size are used to compensate for the heat build-up. This may make termination of the cables more difficult in the second fix stage. Where high-powered circuits are concerned it may become apparent that derating factors make installation impossible. An example of this would be an electric shower where its cable needs to be run through thermal insulation. An electric shower cable is generally quite thick to allow for the demands that instantaneous water heating requires and when derating factors make a larger cable necessary it can be impossible to obtain one that will safely terminate in shower pull cords and shower units themselves! ☹
Back to top4) Materials selection💡
When wondering HOW TO REWIRE A HOUSE, the selection of materials is of paramount importance. A rewire of a property should be intended to last for as long as possible and often, cheaper materials will not have the quality of construction to withstand the test of time. For a high quality rewire with a long lifespan, the installation should be wired and installed using high quality cabling and electrical accessories whilst also ensuring there are adequate circuits for the demand. A single circuit for ALL sockets in the property is likely to receive very heavy use leading to premature failure of the circuit so splitting this into three different circuits will mean less use on each individual circuit. Using a high-quality cable over a cheaper cable will not make a great deal of difference in the overall cost but could mean a longer lasting electrical installation. Using good quality electrical accessories over the cheapest available will not elevate the cost of the materials portion of the work much more and will mean a more robust electrical wiring system is installed overall.
Back to top5) Tools required
There is no better tool for cutting channels into walls than a wall chaser and dust extraction unit. There are some models of wall chaser that now allow the whole chase to be removed in one hit without the need for additional chiselling of the wall. This combined with the efficiency of good quality modern dust extraction units means that wall chasing can be carried out in its entirety virtually dust free. Not only does this save time but means that the electricians carrying out the work and the people in the property are not likely to be exposed to dangerous construction dust. This can also save a lot of time on the clean-up afterwards. A good quality cordless hammer drill is vital along with an impact driver for fixing boxes into walls. There is a growing requirement to ensure that connections are safe and most manufacturers of electrical accessories will specify a set torque for their connections. This is prevalent in consumer units also and as such, a torque screwdriver set can be a useful tool to have to ensure that the torque requirements of each accessory, circuit breaker or switch are met. The usual electricians’ tools of a GS38 approved voltage detector, a multi-function tester capable of all testing requirements laid out in IET guidance note 3 and an array of insulated screwdrivers, side-cutters and pliers are vital in the rewire and installation process. There are of course many more tools that can make an electrician’s life much easier when carrying out a rewire but these are the core tools that are necessary.Another tool that is incredibly useful and always helpful when rewiring a house is a set of cable rods. When trying to get a cable from one end of the room to the other under the floorboards, a set of cable rods will achieve this without the necessity of lifting several floorboards. A wireless camera! These devices are pure genius and many can be installed onto the end of a set of cable rods. This is incredibly useful when fishing cables through voids as it allows the installer to literally see where the cable is heading by using the screen on their smartphone or other device.
Back to top6) Installation locations🛁
Thought should be given when installing a consumer unit such that it meets the requirements of the regulations and allows adequate space for maintenance or fault finding in the future. Placing a consumer unit in the basement is absolutely no use if the journey down there in the dark is treacherous and the damp will ruin it within a few years anyway. Sockets and switches should be installed such that they are easily accessible, will not cause damage to the cords or plugs of appliances when connected and are not likely to suffer any mechanical damage. Light fittings should be installed in areas where they will provide the greatest illumination, one area where many installers can go wrong is the amount and placement of downlights in a new installation. This can occur in Kitchens in particular as too close to the worktops will cause shadows from the cabinets and too far away will cause shadows to be cast from our bodies when carrying out kitchen tasks. Light fittings installed in special locations should comply with the requirements for that location and Zone. What does this mean? Well, we can’t go installing non water proof 230-volt light fittings in the bath tub for example! 😊
Back to top7) Consumer unit requirements
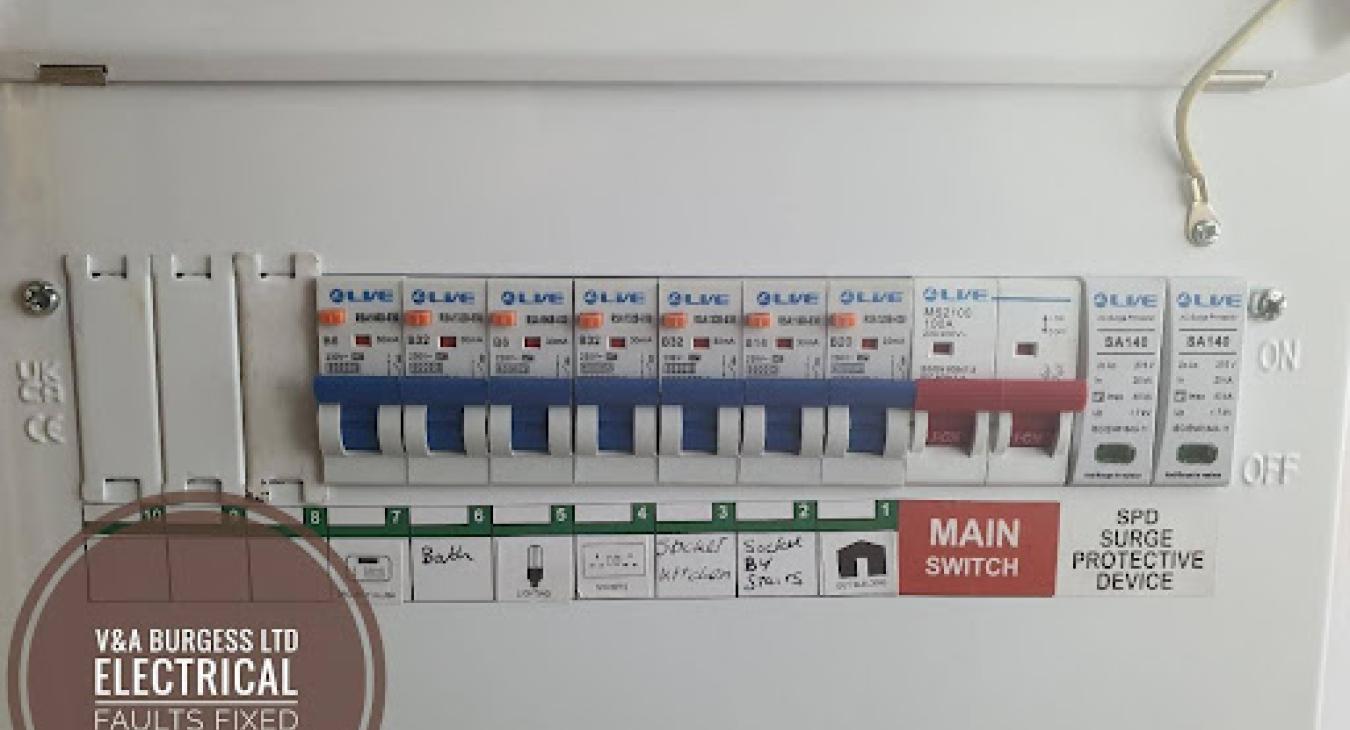
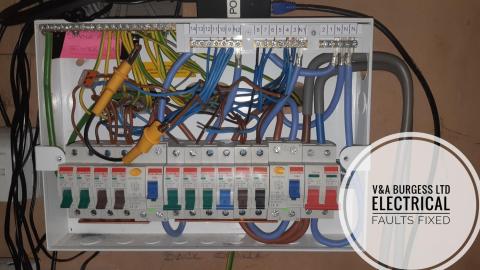
‘The Brains’ of the electrical installation should be chosen carefully and in accordance with the design process. The RCBO (Residual Current Breaker with Overload) consumer unit with integral SPD (Surge Protection Device) is currently very popular and the choice for many electricians. There are several great, reliable brands of consumer unit on the market and some research should be carried out to ensure that the unit is of sufficient quality and integrity to fulfil the requirements of the electrical installation. Purchasing a unit that has too few spare ‘ways will mean that things are cramped inside and there is no room for expansion of the installation in later years. A consumer unit should generally contain two or more spare ways to allow for expansion of the electrical system without the need for a secondary consumer unit to be fitted later on. There is the consideration for the AFDD device (Arc Fault Detection Device) these days. At the time of writing, they are not an absolute requirement in many cases and the cost can prove prohibitive but as with all technology, these will come down in price.
Compatibility between protective devices and design currents should have been considered and the right protective devices and ratings installed.
8) First Fixing & Construction Phase🧑🔧
Before fixing takes place, each drum of cable should be insulation resistance tested to ensure that there are no quality control issues with the cable. There is little more frustrating than installing brand new cable to then have a fault on the system. The ‘First Fix’ is the process of lifting floorboards, chasing walls, and making access for wiring. The wiring is then run throughout the property, secured, and protected before plastering. The back boxes for sockets and switches are installed using whichever method is suitable for the building fabric and care taken to ensure that cables cannot be damaged on entry to the back boxes. Rubber grommets are normally used to protect the cables from the sharp edges of the back boxes to prevent future shorting out to the electrical system. The first fix stage should also see the installation of any required Equipotential Earth Bonding to pipework or other extraneous conductive parts of the property. Once first fixing has been completed, the testing process begins. The requirements of Guidance Note 3 (IET) should be followed and test results recorded. This proves that the installation is sound before any further building work commences such as plastering or boarding over.
Back to top9) Second Fixing
Second fixing is the process of fitting the remaining electrical accessories and consumer unit into the electrical installation. All connections should be checked and care taken not to damage any electrical accessories. This is a good time to visually inspect cabling and boxes to ensure that the final stages go smoothly. Plaster in boxes can ruin screw threads, trowels may have damaged wiring and any excess water should be allowed to dry out before installation of electrical accessories. Care should be taken second fixing to prevent any damage to wiring in the back boxes or cables for ceiling lights. Any buried junction points should be Maintenance Free type junctions to ensure compliance with the wiring regulations and prevent future problems.
Back to top10) Testing and Inspection process⚡
The testing and inspection process in the final stages involves all testing required during the ‘initial verification’ process.
- Continuity of Protective and Bonding Conductors
- Ring Final Continuity Testing
- Insulation Resistance Testing
- Polarity dead, confirmed
- Live polarity at the incoming supply
- Earth Fault Loop Impedance of the external supply checked to ensure compliance with the earthing system type
- Prospective Earth Fault Current should be checked to ensure compatibility with protective devices
- Prospective Short Circuit Current
- Earth Fault Loop Impedance of the system and final circuits should be checked, normally by calculation to ensure compliance with EAWR 1989
- RCD testing should be carried out to ensure they meet the requirements of the wiring regulations.
11) Typical obstacles and issues that arise
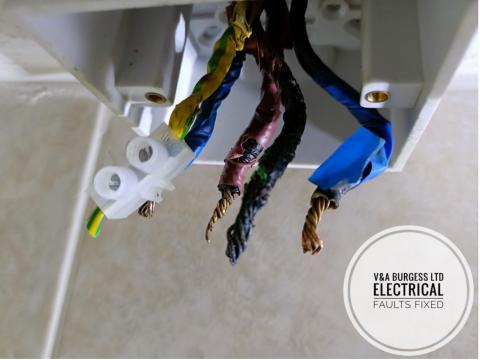
When carrying out a rewire there can be many problems that can cause issues for the electrician and client. One of the most common problems is uncovering hidden building defects. Until the building fabric is disturbed, all we see is paint and floor coverings. There can be rot, damp, woodworm, asbestos, structural issues with joists and walls and much more. When these issues arise, they can slow progress or grind it to a halt whilst other tradespeople are consulted for the issues found to be put right. Loose plasterwork can be an issue when chasing walls and installing electrical systems. This issue is much more common in older properties with old school plastering systems. This should be considered before carrying out a rewire and plans put in place to replaster once work has been carried out. Issues with old roofs can be discovered whilst running cabling through lofts which can then delay the installation as repairs are carried out. It is not a good idea to install a brand-new electrical system, for instance, if it is going to become soaked through a roof with an aging covering or daylight shining through.
Back to top12) Documentation required📋
When thinking HOW TO REWIRE A HOUSE it is important to remember the documentation required. The Electrical Installation Certificate needs to be completed and signed along with the Schedule on Inspections and Schedule of Test Results. Without these documents there is no way to commission the new installation and ensure its safety or suitability for use. The other document that is required is the Building Control Compliance document. This is normally received when the electrician notifies building control of the new installation. This document proves that the installation has been carried out in accordance with the building regulations and holds the electrician to account if there are any installation problems that breach the building regulations.
Back to top13) Handover to client
The handover to the client should include the documents above and all documentation relating to the wiring installations accessories. Manufacturer’s instructions for all the connected equipment should be handed over along with a visual demonstration of how everything operates. The consumer unit should and its operation should be explained in plain language to the customer and any necessary stickers relating to operation of the devices should be applied. It is a good idea to use a sticker with the installers contact details on the consumer unit so, in the event of a fault, the customer can contact the original electrician whom may be familiar with the installation.
📞 01925 595 980 (Warrington)
📞 0151 351 4011 (Liverpool)
📧 Enquire online
💻 Visit our website
Back to top


